- Oracle HTTP Server
- JRockit
- Oracle Weblogic Server
- Oracle Identity Management
- Oracle SOA Suite
- Oracle Identity and Access Management

These version are also shipped with the installation DVD's. However further from chapter four on and the rest of the manual describes installations steps for the next versions:

Even when you are installing these combination of versions, you will fail when installing IAM, which requires Oracle Weblogic Server 10.3.5. And these versions are not shipped with the installation DVD's nor are they part of the Fusion Applications section on eDelivery. So I downloaded IDM components 11.1.1.5 and Weblogic Server 10.3.5 from eDelivery and Technet. After downloading and staging the software, I ended up with the following directories:

I used the directories database and rcu in my previous post to install the database and create schema's.
We will now install the software in the sequence:
- webtier (Oracle HTTP Server 11.1.1.2)
- webtierpatch (Oracle HTTP Server 11.1.1.5 patchset, no direct installer for 11.1.1.5)
- jrockit (JRockit-JDK1.6.0_24-R28)
- weblogic (Oracle Weblogic Server 10.3.5)
- idm (Oracle Identity Management11.1.1.2)
- idmpatch Oracle Identity Management 11.1.1.5 patchset, no direct installer for 11.1.1.5)
- soa (Oracle SOA Suite 11.1.1.5)
- iam (Oracle Identity and Access Management 11.1.1.5)
Oracle HTTP Server 11.1.1.2
Start in directory webtier and initiate the installer by:./Disk1/runInstaller
On the Welcome screen Click Next. On the next screen chose to option Install Software - Do Not Configure.

Now a screen checks prerequisites.

After all prerequisits have be checked Click on Next.
Now we have to specify where to install the software.

Enter /u01/app/oracle/product/fmw as Oracle MiddleWare Home and enter web as Oracle Home Directory.
On the next screen I choose not to be informed of security updates.

On the Summary screen click Install to start the installation. This concludes the installation of Oracle HTTP server 11.1.1.2. We will now patch this to 11.1.1.5.
Oracle HTTP Server 11.1.1.5
Go to directory webtierpatch and start the installer by initiating:./Disk1/runInstaller
On the Welcome screen click Next.

Again enter /u01/app/oracle/product/fmw as Oracle MiddleWare Home and enter web as Oracle Home Directory.
On the next screen I choose again not to be informed of security updates. On the Summary screen click on Install and Web Tier 11.1.1.5 will be installed.
JRockit
Start the Jrockit installer by issuing the command:
chmod +x jrockit-jdk1.6.0_24-R28.1.3-4.0.1-linux-x64.bin
./jrockit-jdk1.6.0_24-R28.1.3-4.0.1-linux-x64.bin
On the Welcome screen click on Next.

Set installation directory to /u01/app/oracle/product/fmw/jrockit-jdk1.6.0_24 and click on Next. On the next screen (Optional Components) choose Next. Installation of JRockit is finished.

Add the following lines to .bash_profile of the oracle user.
MW_HOME=/u01/app/oracle/product/fmw; export MW_HOME
JAVA_HOME=$MW_HOME/jrockit-jdk1.6.0_24; export JAVA_HOME
PATH=$JAVA_HOME/bin:$PATH export PATH
This will stop the installers from keep asking for the JRE path.
Log off and log to to trigger .bash_profile and set above environment variables.
Weblogic Server 10.3.5
Start in directory weblogic and issue the following command:java -d64 -jar wls1035_generic.jar
On the Welcome screen click on Next.

On the next screen fill in MW_HOME and click on Next. A popup screen will warn as that this is not an empty directory. Choose Yes to proceed. On the Security Updates screen choose not to be informed. On the next screen choose Typical installation.

On the next screen we have to select JDK. Choose JRockit we installed in previously.

On the next screen keep the default locations for Weblogic Server and Oracle Coherence and click on Next. On the Summary screen click on Next and the installation will start.
Oracle Identity Management 11.1.1.2
Start in directory idm and issue the following command:./Disk1/runInstaller
On the Welcome screen click on Next.

On the next screen choose the option Install Software - Do Not Configure. Prerequisites checks screen shows, click on Next.

Enter /u01/app/oracle/product/fmw as Oracle MiddleWare Home and enter idm as Oracle Home Directory. On the Security Updates screen choose not to be informed. On the Summary screen click on Install and the installation will start. At the end of the installer the following popup screen shows.
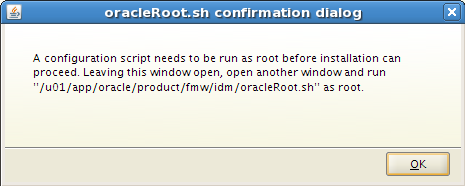
As stated run this scripts as root and click on OK. Installation of IDM 11.1.1.2 is now finished.
Oracle Identity Management 11.1.1.5
Start in directory idmpatch and issue command./Disk1/runInstaller
On the Welcome screen click Next.

Enter /u01/app/oracle/product/fmw as Oracle MiddleWare Home and enter idm as Oracle Home Directory. On the Security Updates screen choose not to be informed. On the Summary screen click on Install and the installation will start. At the end of the installer the following popup screen shows.

When running this scripts, you will be prompted if you want to confugure OID for privileged ports. Enter yes and click on OK after the script finishes.

Port below 1024 are privileged on Linux and this will free the default port 636 for OID. Now we have installed IDM 11.1.1.5
Oracle SOA Suite 11.1.1.5
Start in directory soa and issue command
./Disk1/runInstaller
On the Welcome screen click on Next. On the next screen choose to Skip Software Updates. The prerequisites screens shows.

Enter /u01/app/oracle/product/fmw as Oracle MiddleWare Home and enter soa as Oracle Home Directory.

On the next screen choose Weblogic Server as Application Server. On the Summary screen click on Install and the installation will start.
Oracle Identity and Access Management 11.1.1.5
Start in directory iam and issue command./Disk1/runInstaller
On the Welcome screen click on Next. On the next screen choose to Skip Software Updates. The prerequisites screens shows.

Enter /u01/app/oracle/product/fmw as Oracle MiddleWare Home and enter iam as Oracle Home Directory. On the Summary screen click on Install and the installation will start.
Creating the wlfullclient.jar File
The installation manual states:Oracle Identity Manager uses the wlfullclient.jar library for certain operations. Oracle does not ship this library, so you must create this library manually.
No idea what it is used for, but let's just follow the manual. Create the wlfullclient.jar like follow:
After installing all these components we end up with the following MW_HOME:

In the next posts I will describe the steps to configure the individual components and the configuration of the integrations between components.
[...] Now we have created all necessarily schema’s and are ready to start the installation of Identity Management Components. [...]
ReplyDeleteGreat post. Looking forward for more on this from configuration perspective.
ReplyDeleteA quick question:
I understand you are installing them under Linux x64. Is there a specific reason for Jrockit installation? what about the JDK?
Can you pls elaborate on this selection - which one and why? Thank you in advance.
Regards
Vijay Chinnasamy
Vijay,
ReplyDeleteJRockit was a part of BEA Systems (Weblogic). As Weblogic Server is the main application server for Fusion Middleware, Oracle made JRockit the main JDK/JRE for their software.
Hakan
[...] my previous post, I installed the components for IDM. In this post I will describe the steps to configure Oracle Web [...]
ReplyDeleteHi,
ReplyDeletecould you please advise where did you find the IDM components to install? I have download build 17 and under installers folders (/catalin/fusion_apps/installers) i can see
$ ls
apps_rcu crm_rcu faprov iir oracle_common wc
atgpf database fmw_rcu jdk powercenter webgate
bhd DataLens fusionapps odc ses weblogic
biapps_rcu dbclient gop odi smart_update webtier
biappsshiphome ecm_bucket2 idm ofr soa webtier_patchset
Under idm, there's only the folloiwng:
$ ls idm
iamsuite iamsuite1.zip iamsuite2.zip iamsuite3.zip iamsuite4.zip
Could you please advise? Thanks.
Hi Catalin,
ReplyDeleteAs mentioned in the post the the FusionApplications DVD's are shipped with FMW 11.1.1.4 whereas the manual describes installing IDM components 11.1.1.5. So I downloaded manually all IDM components described in this post from edelivery.oracle.com. Search with criteria Oracle Fusion Middleware as Product Pack and Platform Linux x86-64. In the results list, select Oracle Fusion Middleware 11g Media Pack for Linux x86-64.
You can also login to edelivery.oracle.com and the try this url to gain direct acces to the FMW Product Pack https://edelivery.oracle.com/EPD/Download/get_form?egroup_aru_number=11571971
Do this installations use one machine for OIM and OAM with one database?
ReplyDeleteDear
ReplyDeleteI want to install IDM and what are the software required on Linux to install IDM.