
As described in the previous post PeopleSoft Mobile Inventory is build on ADF Mobile pages. In order to run these pages you need to install Application Development Runtime, which runs as an extention of Weblogic Server. To be able to install Weblogic Server, first you have to install a JDK. I have downloaded and installed JDK 1.6.0_31. I will not describe the installation steps of JDK.
I will install all software needed on a Windows 2008R2 64bit Server.
Weblogic Server
Start a commd prompt and set the directory to the JDK installation folder and initiate the Weblogic installer.C:Install>set JAVA_HOME=C:appsJavajdk1.6.0_31 C:Install>java -jar wls1034_generic.jar
On the the Welcome screen click on Next.

Choose to create a new Middle Home and supply a WLS_HOME directory. I installed it, as shown above in c:appsOracleWSLMobile. You can also see that I have other Weblogic Server installations on this server, these will not conflict and can easily exists together. After this click on Next. Now the Register for Security Updates screen shows. Choose not be informed on security updates and click on Next. Now the Choose Install Type screen shows.

Choose option Typical and click on Next.

On the JDK Selection screen, choose the JDK and click on Next. If no JDK is listed, click on browse and provide the JDK home as the one in the start of this post.

On the Choose Product Installation Directories screen leave the directories default and click on Next.

On the Choose Shorcut Location select All Users options and click on Next.

Now the Installation Summary screen shows, with all chosen setting. Click on Next and the installation of Weblogic Server will start.

After the binaries have been copied to WLS_HOME, the Installation Complete screen shows. On this screen check the Run Quickstart checkbox and click on Done.

On the Quickstart screen click on Getting started with Weblogic 10.3.4.

Choose to Create a new Weblogic domain and click on Next.

On the Select Domain Source screen, the option Basic Weblogic Server Domain is pre-selected and disabled. Do not select other options and click on Next.

Now provide a domain name, I choose mobile_domain and click on Next.

Now provide the Weblogic admin user and password of your liking and click on Next.

Select an available JDK and click on Next.

On the Optional Configuration screen do not select any options and click on Next.

On the Summary screen click on Create to create the mobile_domain.

The installation of Weblogic Server is now done and a domain has been created. Now Application Development Runtime will have to installed on the domain.
Application Development Runtime
After you have extracted the Application Development Runtime installer, you will have two directories Disk1 and Disk2. From the Disk1 folder start setup.exe. A command box will start.
Here provide the location of the JDK installation and press Enter. The installer GUI will start.

On the Welcome screen click on Next.
On the Software Updates screen choose to Skip Software Updates and click on Next.

Now prerequisite checks will be preformed. If all checks passed, click on Next.

Now specify the location of the Weblogic Server and click on Next.

On the Application Server screen Weblogic Server is pre-selected. Leave this as is and click on Next.

Now the Summary screen shows with all settings. Click on Install to install the binaries.

If all goes well the installation of the binaries of Application Development Runtime have now been succesfully installed. Now we need to Extend the the domain with the Application Development Runtime. To do this, go to the start menu of Windows and select Quickstart from within the Weblogic Server folder.


On the QuickStart screen click on Getting started with Weblogic.

Now choose option Extend an existing Weblogic domain.

Now select mobile_domain and click on Next.

Select following options and click on Next:
- Oracle Enterprise Manager
- Oracle JRF

On above screen leave all value as is and click on Next.

On the optional services screen, do not select any options and click on Next.
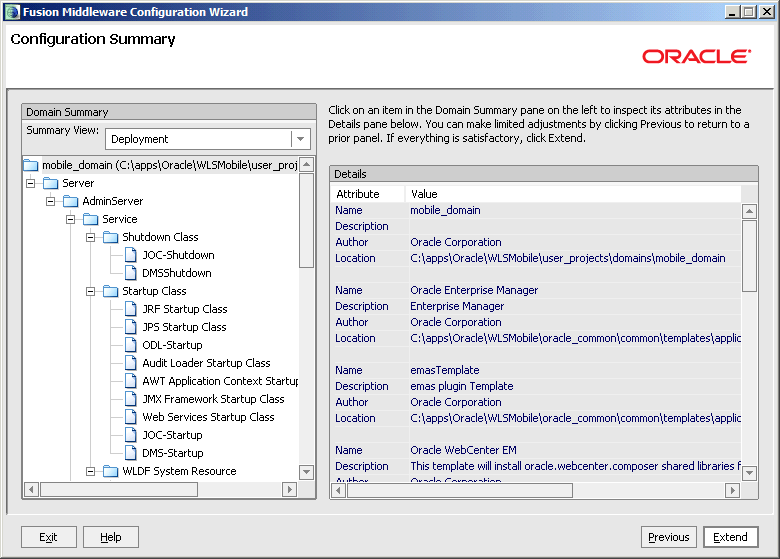
On the Summary screen click on Extend, to extend domain mobile_domain with Application Development Runtime.
After this the Completion screen shows. Click on Done.
Now from the the start menu of Windows select Start Admin Server for Weblogic, from within the Weblogic Server folder.

After the admin server has started, you should be able to see the login screen via http://localhost:7001/console

Back to installation overview.
No comments:
Post a Comment